
Table of Contents
- Understanding the Scope: Time Estimation Guide
- Essential Professional Tools for Winter Safety
- Materials Checklist and Cost Analysis
- Calculating Material Needs by Project Size
- Step-by-Step Process and Common Mistakes
- Professional Hiring Costs Across Major U.S. Cities
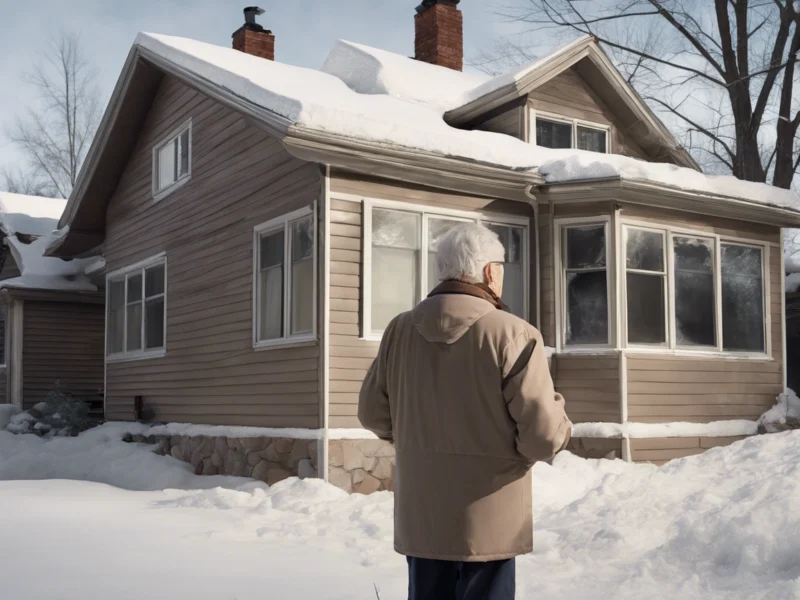
Winter can be a challenging season, especially for senior citizens. As a home repair specialist, I’ve witnessed firsthand how crucial it is to ensure safety and warmth during these colder months. This article will delve into comprehensive winter safety tips for senior citizens, providing actionable advice to enhance safety at home.
Understanding the Scope: Time Estimation Guide
Understanding the time required to implement winter safety measures can help streamline the process, ensuring you or your loved ones are adequately prepared before the onset of the cold weather. Typically, winterizing a home could take anywhere from a few days to a few weeks, depending on the size of the home and the extent of the preparations needed.
- Initial Assessment: Start with a thorough inspection of the property. This can take a day or two. Check for drafts, inspect the condition of heating systems, and ensure all safety alarms are functioning. The initial assessment is crucial to identifying areas that need attention.
- Draft-Proofing Windows and Doors: This task can be done over a weekend. Installing or replacing weather stripping around doors and windows can prevent heat loss, which is paramount for senior citizens who may be more susceptible to cold.
- Heating System Maintenance: Scheduling a professional to service your heating system is essential. This can take a few hours to a day, depending on the system’s condition. Regular maintenance can prevent breakdowns during the coldest days.
- Insulation Upgrades: This might require a few days, especially if you’re adding insulation to attics or walls. Adequate insulation is crucial to maintaining a warm home environment.
- Safety Equipment Check: Ensure all smoke and carbon monoxide detectors are functioning. This is a day-long task but should not be rushed, as it’s critical for safety.
- Outdoor Preparations: Clearing gutters and ensuring outdoor walkways are safe can take a day or two. This helps prevent ice build-up, reducing the risk of falls.
Each task’s time can vary based on the home’s specific needs and the availability of resources. Consider creating a timeline to keep track of these tasks, ensuring nothing is overlooked as winter approaches.
Essential Professional Tools for Winter Safety
To effectively carry out winter safety measures, having the right tools is vital. Over the years, I’ve compiled a list of essential tools that make these tasks easier and more efficient.
- Cordless Drill: Useful for installing weather stripping and other minor repairs. A cordless drill is versatile and eliminates the need for extension cords, which can be a tripping hazard.
- Infrared Thermometer: This tool helps identify heat leaks and poorly insulated areas in the home.
- Weather Stripping Kit: Available at Home Depot, these kits are crucial for sealing gaps around windows and doors.
- Ladder: A sturdy ladder is essential for gutter cleaning and checking roof conditions. Always ensure it is positioned safely to prevent falls.
- Pipe Insulation Sleeves: These are necessary for insulating exposed pipes, preventing them from freezing.
- Gutter Cleaning Tool: Keeping gutters clear of debris is crucial to prevent ice dams, which can lead to water damage.
These tools not only make the winterizing process more manageable but also enhance the effectiveness of the safety measures you implement. Investing in quality tools can save time and prevent potential hazards during the winter months.
Materials Checklist and Cost Analysis
Before embarking on winter safety preparations, compiling a comprehensive materials checklist is beneficial. This ensures you’re fully equipped for tasks, avoiding last-minute trips to the store.
| Material | Estimated Cost | Purpose |
|---|---|---|
| Weather Stripping | $10-$30 | Seals gaps around doors and windows |
| Insulation (batts/rolls) | $0.50-$1.50/sq ft | Enhances home insulation |
| Pipe Insulation Sleeves | $1-$5 | Prevents pipes from freezing |
| Furnace Filters | $5-$30 | Maintains heating system efficiency |
| Salt/Sand for Walkways | $10-$20 | Reduces slipping hazards on icy surfaces |
| Smoke/CO Detectors | $20-$50 | Essential safety devices for winter months |
- Weather Stripping: Available in various materials, weather stripping helps reduce drafts, lowering heating costs and maintaining a comfortable temperature.
- Insulation: Consider the specific areas needing insulation. Measure these areas to accurately determine how much insulation you’ll require. Attics and crawl spaces often benefit the most from added insulation.
- Pipe Insulation: Essential in areas where pipes are exposed to cold air, such as basements or attics, to prevent freezing and potential bursts.
- Furnace Filters: Regularly replacing filters ensures that the heating system operates efficiently, reducing energy costs and prolonging the system’s lifespan.
- Ice Melt or Sand: It’s crucial to keep outdoor walkways safe for senior citizens. Consider eco-friendly options to minimize environmental impact.
- Safety Detectors: Test all smoke and CO detectors. If they’re outdated, replace them to ensure they function correctly during the winter months.
By preparing this checklist and understanding the associated costs, you can budget effectively and prioritize tasks based on available resources. For detailed product options, visit Home Depot.
Calculating Material Needs by Project Size
Accurate calculation of material needs is vital for efficient winter preparedness. Here’s how to determine the correct amounts for various projects.
- Window and Door Draft-Proofing: Measure each window and door’s perimeter to calculate the total length of weather stripping needed. Consider buying extra to account for errors or additional coverage.
- Insulation Needs: Measure the square footage of areas requiring insulation. Factor in the R-value, which indicates thermal resistance. Higher values provide better insulation. Check the Department of Energy’s guidelines for your region’s recommended R-value.
- Pipe Insulation: Measure the length and diameter of pipes requiring insulation. Purchase sleeves accordingly, ensuring they fit snugly to prevent air gaps.
- Furnace Filters: Check your furnace’s specifications for the correct filter size. It’s advisable to have a few extra on hand for replacements throughout the season.
- Ice Melt or Sand: Estimate the square footage of outdoor walkways and driveways to determine how much ice melt or sand is necessary. This ensures you have enough to cover pathways without running out midway through the season.
- Safety Detectors: Note the number of rooms and distances from potential hazards, like the kitchen or garage, to ensure adequate coverage with smoke and CO detectors.
Accurate measurements not only help in purchasing the right quantity of materials but also prevent wastage, saving money and resources. This proactive approach can make a significant difference in a comfortable and safe winter season.
Step-by-Step Process and Common Mistakes
Executing winter safety measures requires careful planning and execution. Here’s a detailed step-by-step guide to ensure thorough preparation.
- Initial Inspection: Begin with a complete home inspection. Identify areas susceptible to drafts, leaks, or insufficient insulation. This forms the basis for all subsequent steps.
- Seal Drafts: Apply weather stripping around windows and doors. Ensure all edges are firmly pressed to prevent air leaks. A common mistake is neglecting the bottom of doors; use door sweeps to seal this gap.
- Insulate Attics and Walls: Install insulation in attics and walls as needed. Ensure even coverage to prevent cold spots. Avoid compressing the insulation, as this reduces its effectiveness.
- Check and Service Heating Systems: Hire a professional to inspect and service the heating system. Replace filters and ensure vents are unobstructed. Overlooking this step can lead to system failures during peak usage.
- Test Safety Equipment: Test all smoke and CO detectors, replacing batteries or units if necessary. Neglecting to check these devices can lead to severe safety risks.
- Prepare Outdoor Areas: Clear gutters and secure any loose items in the yard. Apply ice melt or sand to walkways, and ensure outdoor lighting is functional. Ignoring outdoor preparations can lead to accidents due to ice or poor visibility.
Understanding common mistakes, such as improper insulation or neglecting to service heating systems, can prevent problems from arising. For more tips on safe home maintenance, Submit an application for Finding a specialist to perform work in the house.
Professional Hiring Costs Across Major U.S. Cities
Hiring professionals for winter safety preparations can vary significantly by location. Here’s an overview of estimated costs across major U.S. cities.
| City | Heating System Service | Insulation Installation | Gutter Cleaning |
|---|---|---|---|
| New York | $150-$300 | $1.50-$3/sq ft | $100-$200 |
| Los Angeles | $120-$250 | $1-$2.50/sq ft | $80-$180 |
| Chicago | $130-$270 | $1.25-$2.75/sq ft | $90-$190 |
| Houston | $110-$240 | $0.80-$2.20/sq ft | $70-$160 |
| Miami | $100-$230 | $0.70-$2/sq ft | $60-$150 |
- Heating System Service: Prices can vary based on the system’s complexity and technician availability. Regular servicing can prevent costly emergency repairs during winter’s peak.
- Insulation Installation: Costs depend on the type of insulation and the space’s size. Labor rates also contribute to these variations. In colder regions, more insulation might be required, increasing costs.
- Gutter Cleaning: Prices are typically influenced by the home’s size and the number of stories. Regular cleaning helps avoid ice dams and water damage.
- Hiring Considerations: When hiring professionals, ensure they are licensed and have positive reviews. Request estimates from multiple providers to find competitive pricing.
- Potential Discounts: Some companies offer discounts for bundled services or early season bookings. Inquire about any available offers.
- DIY vs. Professional: While DIY can save money, certain tasks like heating maintenance are best left to professionals to ensure safety and effectiveness.
Navigating the landscape of professional services can be daunting, but understanding typical costs and options can help in making informed decisions. By investing in professional services, you can ensure comprehensive winter safety for senior citizens, providing peace of mind throughout the season.
Comments